How to take high-quality product photos without a professional studio and increase sales
-
Sergey Berezin
Copywriter Elbuz
Product photography is one of the most important aspects of running a successful online business. High-quality photographs can attract the attention of buyers, build their trust in your product and increase sales. But what if you don't have access to a professional studio or the ability to hire a professional photographer? Let's imagine a situation: you launched your online store, developed an amazing product that is ready to conquer the market. But how to visualize it so that potential buyers not only see its benefits, but also want to buy it? Of course, you can turn to professional photographers and forget about your problems. They know how to create the perfect lighting, choose the right composition, and make sure your product looks amazing. But what if you don't want to spend money on a photo studio or want to learn how to take photos yourself? Don't despair! In this article, we'll walk you through the best practical tips and tricks for taking quality product photos without a professional studio. We are sure that with our help you will be able to take a photo that will definitely help increase sales of your business. Ready to get started? Let's look at the main aspects to consider when photographing products. Without additional costs for professional services and equipment, with our advice and recommendations you can achieve amazing results. Forward to the success of your business!
Camera
In this section, we'll look at the basic equipment you'll need to take quality product photos - a camera. As we have already noted, the camera is not the key element that determines the quality of a photograph. However, choosing the right camera will help you achieve the desired result more easily.
Selecting a Camera
If you have a camera and know how to use it, then great! This will give you more options for creating professional product photos. However, you don't need to have a camera to take high-quality photos.
Nowadays, smartphones have very good cameras that can take photos of solid quality. If you have a smartphone with a good camera, you can also use it to take product photos. The main thing is to learn how to use it correctly.

Camera Tips
Regardless of which camera you choose, there are a few general guidelines that will help you take good product photos:
Study the camera manual. Feel free to study the manual and experiment with your camera settings. This will help you better understand its capabilities and use them to your advantage.
Play with the lighting. Good lighting is one of the key factors determining the quality of photography. Try using different lighting sources such as natural light, light panels or flash to create the desired effect in your product photos.
🌞 Natural light - photograph the product near a window or outdoor location in bright daylight for a more natural and vibrant image.
💡 Light panels - additional artificial lighting can be useful when creating "studio-like" product shots with uniform and controlled light.
🔦 Flash - When indoor lighting is low, you may need to use a flash to get enough light for product photos. It is recommended to use an external flash to avoid bright highlights and shadows.
Note the focus. Make sure your shot is accurately focused on the product. This can be done by touching the smartphone screen in the desired place or using autofocus on the camera.
Think about composition. Think about what elements you want to include in the frame and how to arrange them. Try using the rule of thirds to create more interesting product shots.
Don't be afraid to experiment. Use different angles, perspectives, and frames to create unique and eye-catching product photos.
Review: How to choose and use a camera for product photography
| Useful things to do | What to avoid | |
|---|---|---|
| ✔️ | Study the camera manual | Be puzzled by complex settings |
| ✔️ | Experiment with lighting | Shoot in dark rooms without backlight |
| ✔️ | Focus on the product | Blur the focus or blur the image |
| ✔️ | Pay attention to the composition | Fill the frame with unnecessary elements |
| ✔️ | Use different angles and frames | Limit yourself to standard approaches |
Tripod
Don't skip this part! 💡
A tripod is the key to a successful exposure. It allows you to photograph products from a certain angle, at the same height and make your photos, in a good sense, identical. This is one of the few components of a quality photo that is worth spending money on. While this may seem like an unnecessary expense to some, tripods are still inexpensive tools that can greatly improve the quality of your product photography.
Why do you need a tripod?
Tripods provide stability and frame stability, which is especially important when photographing products. Using a tripod allows you to free up your hands, focus on composition, and ensure clear images without the risk of blurry photos. This will allow your customers to get the right idea about the product and increase trust in your business.
How to choose a tripod?
When it comes to choosing a tripod, it is important to consider several factors. First, pay attention to the height and weight of the tripod. A tall tripod can be useful for high-level product photography, while a compact tripod can be handy when working in tight spaces or on location. Also pay attention to the weight of the tripod so that it is not too heavy when transporting.
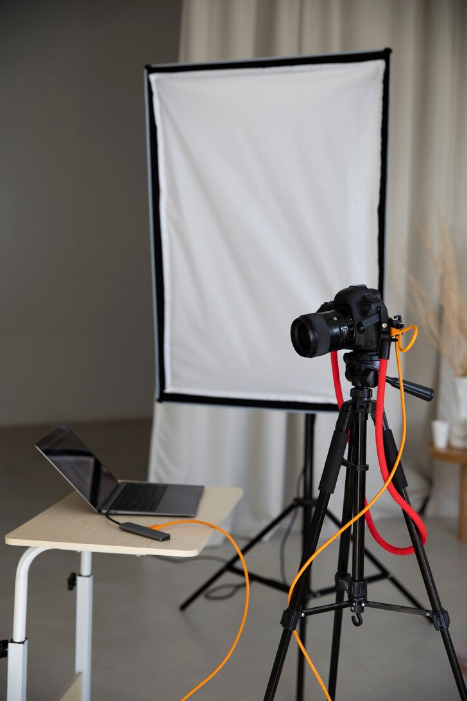
Another important factor is the maximum load of the tripod. Make sure it can support the weight of your camera equipment and additional accessories such as flashes or lenses.
Lighting and a Tripod
Remember that using a tripod doesn't just give you the ability to focus on your composition, it also opens up opportunities for better lighting work. You can use light sources, reflectors and diffusers to create an optimal atmosphere and highlight the benefits of your product.
How to take a photo using a tripod?
- Place the tripod on a flat surface.
- Attach the camera to the tripod, making sure it is secured securely.
- Set the exposure and composition settings as desired.
- Place the item in the desired position and angle.
- Adjust the height, tilt and rotation of the tripod to get the shot you want.
- Capture a photo using the remote control or timer.
Start taking photos!
Now that you know the importance of a tripod and how to use it, you can start shooting. Remember that a tripod is just one of many tools that will help you take compelling product photos. Use it in combination with other techniques and tools, such as proper lighting, a quality camera and photography equipment.
💡 Expert Tip: "A tripod is an essential part of product photography. It helps create a steady shot and gives you the opportunity to play with angles and lighting to show off your product in the best light." - professional product photographer Viktor Shvedov, Epicenter.
What should you consider when choosing a tripod?
| Helpful | Not recommended |
|---|---|
| Tripod height is appropriate for your type of shooting | Too heavy tripod that will be awkward to use |
| Maximum tripod load matches your equipment | Poor tripod build quality and materials |
| The tripod's rotation area is limited, limiting your shooting freedom |
Don't waste time, start shooting!
A tripod is an indispensable tool for creating high-quality product photographs that will help attract customer attention and increase sales. Use our tips and expert opinions to choose the perfect tripod for your needs. Don't forget to experiment with lighting and composition to make your product photos even more eye-catching and marketable!
📸 Have a nice and successful photo shoot!

Background
Choosing a background is an important element when creating quality product photos. It can significantly affect the perception and appeal of an image. In this section, we'll show you how to choose and use backgrounds for your photos in a way that will attract attention and increase sales.
The importance of the right background
A high-quality product image should be pleasing to the eye and attractive to potential buyers. The background plays a key role in creating this effect. It should be simple, monochromatic and not distract attention from the product itself.
How to choose a background
To create a high-quality product photo, it is recommended to choose a white background. The white background creates a clean and professional feeling. You can use a clean white material of sufficient area as a background. Fabric, wallpaper, paper and other items can be a great option.
If you want to use a background of a different color, keep in mind that it should be a single color and not block attention from the product. Colorful and complex patterns on the background can create illegibility and distract the buyer's attention.
Ideas to Try
While we recommend using a white background, you can also experiment with other backgrounds to suit your brand concept. For example, if your brand is associated with nature or ecology, you can try using a background with a natural landscape. The main thing is that the background emphasizes the uniqueness of your product and helps create the right mood.
Best practices
- Use a solid background that does not distract attention from the product.
- White background is the most popular and versatile choice.
- Remember visual consistency. Use the same background for all your products to create a consistent look.
- Make the background flat and smooth to create an aesthetically pleasing effect.
"Choosing the right background for your product photos is a key step to creating attractive and effective images. A white background is the most popular and versatile option, but you can also experiment with other colors to suit your needs." context of your brand." - Product Photography Expert William Clapton, Lexus.
Optimizing background images
When analyzing background images, we must consider optimizing them to achieve better results. Here are some tips:
- Compression : Before uploading photos to your website or online store, be sure to compress the image. Compression will help reduce file size, speed up page loading, and provide a smoother experience for users.
- Resolution : Pay attention to the resolution of your photos to ensure they are the optimal size to display on your website. Images that are too large can slow down page load times.
- File Format : Use the image format that is most effective for your specific situation. For example, if you have a photo with a transparent background, choose the PNG format to save high quality.
- Alt Text : Don't forget to add alt text to your images. This will help search engines understand the content of the image and increase its overall accessibility.

Review
In this article, we looked at the importance of choosing the right background for product photos. We recommended using a white background as it creates a clean and professional feeling. However, you can also experiment with other backgrounds that fit the context of your brand. It's important to keep visual consistency in mind and optimize background images for optimal results.
We hope that our recommendations will help you create high-quality product photos that will attract attention and increase sales for your business.
"Choosing the right background for your product can enhance its appeal and highlight its uniqueness. We recommend using a white background, which provides a clean and professional look. However, there are other opportunities to experiment, especially if they match context of your brand." - Product Photography Expert Vladimir Agafonov, Rosette.
Useful to do:
| Do | Don't |
|---|---|
| Choose a plain background that does not distract from the product | Use complex patterns and bright colors on the background |
| Try to experiment with other color options | Use low-resolution and uncompressed images |
| Maintain visual consistency in background use | Ignore background image optimization |
| Pay attention to image quality | Fill all photos with a lot of detail |
Take our recommendations into account when creating product photos and you are guaranteed attractive and effective images.
Lighting
Why is lighting so important for good photography?
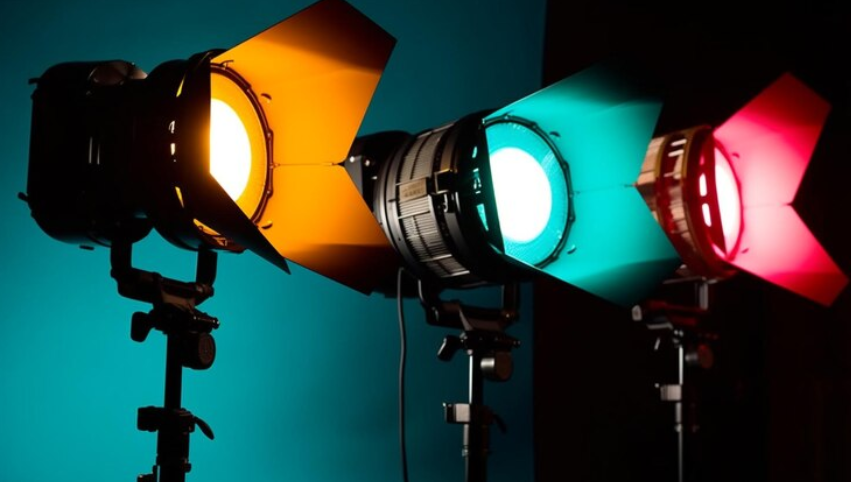
Lighting is one of the key factors that determines the quality of product photography. It influences what detail and texture is visible in an image, as well as setting the mood and attracting buyers' attention. Proper lighting will help highlight the advantages of a product, emphasize its unique features and remove shortcomings.
How to create the right lighting without using a professional studio?
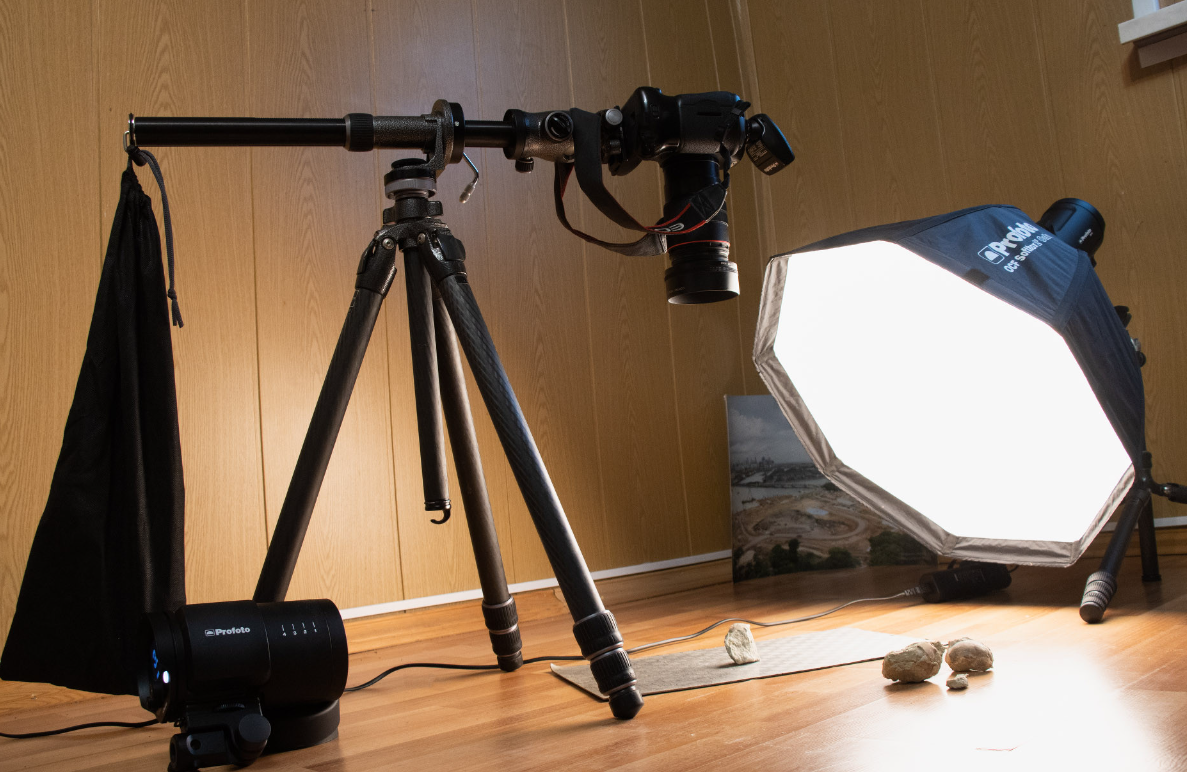
To create high-quality lighting, you do not need to have professional equipment. Your home can be a great location for a photo shoot. You will need a room with plenty of natural light, a table, and white boards, plastic, cardboard or plain paper as a reflector.
How to use a reflector correctly?
A reflector helps remove shadows created by the light source and distribute it evenly across the subject. It is necessary to place the reflector on the opposite side of the light source so that it reflects the light back onto the object. This will help soften shadows and create softer, more even lighting.
How to choose a time for a photo shoot?
Timing your photo shoot is also important to achieve optimal lighting. The best time to photograph products is during the day when the light outside is soft and even. This could be morning or evening when the sun is low. Avoid shooting on a bright sunny day, where the light may be too bright and create harsh shadows.
How to use additional light sources?
Sometimes using natural light alone is not enough to achieve optimal lighting. In such cases, you can use additional light sources, such as table lamps or special photographic lamps. They will help you create the right lighting and highlight the details of the product.
What mistakes should you avoid?
When working with product lighting, there are a few common mistakes to avoid:
- Using lighting that is too bright, which can create harsh shadows and blown-out areas in the image.
- Using lighting with bright colors that can distort the shades and colors of the product.
- Light source positioned too close to product, which may create uneven lighting and shadows.
Product lighting best practices
- Use natural, bright lighting to create soft, even shadows.
- Try using a reflector to remove harsh shadows and create softer lighting.
- Choose a time for a photo shoot when the light outside is soft and even.
- Use additional light sources if natural light is not sufficient.
- Avoid too bright lighting and bright colors so as not to distort the shades and colors of the product.
"Proper lighting is the foundation of great product photography. It helps attract the attention of potential buyers and highlight the unique features of the product." --Expert Photographer Dominic Allford, Kodak.
| Things to do | Things not to do |
|---|---|
| Use natural, bright lighting | Use too bright lighting |
| Use a reflector to remove shadows | Use bright colors in lighting |
| Take photos at a soft and even time of day | Place the light source too close |
| Use additional light sources if necessary | Use too many light sources |
Scotch tape
Did you really think you could do something at home without Scotch tape? 🔒
You've probably already encountered a problem where you need to secure something in place but the adhesive strips aren't very secure, or maybe you're unpacking a new delivery and need to quickly secure some parts to make product photo. The problem can be solved with one universal tool - tape.
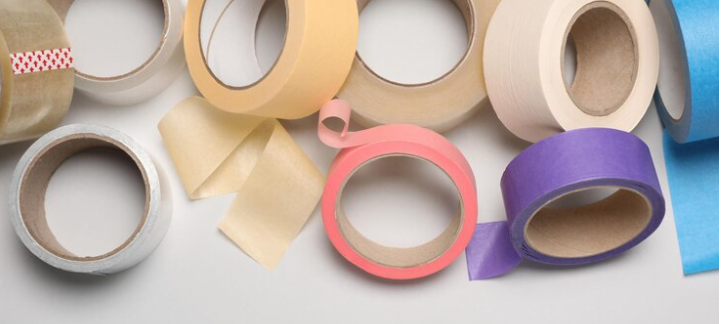
How can tape improve the quality of your product photos? 📸
Fixing Items : One of the main points when photographing products is to keep them in a certain position to get a good angle and lighting. Using tape, you can easily secure products to a table or other surfaces to keep them stationary while you shoot.
💡 Expert Tip: When using tape to secure an item, be sure to choose medium strength tape to avoid damage or leaving marks on the surface of the item.
Creating a Background : Sometimes the background you photograph your products against may not be ideal. To create a clean, uniform background, you can use tape to secure the paper or fabric backdrop. Simply mount it on a vertical surface or use a backdrop stand. This will help you get professional product photos.
💡 Expert Tip: Choose a background color that matches your products perfectly to create a stylish and harmonious overall look.
Composition and substitution : While taking photos, you can make changes to the composition, change the position of objects, or add various accessories to enhance the image of the product. Using tape, you can secure accessories or temporarily reposition items to see which options work best for your item.
💡 Expert Tip: Try using different accessories and experiment with different compositions to find the most attractive look for your product.
Best practices for using tape when photographing products 📝
| Action | Helpful | Not useful |
|---|---|---|
| Fixing goods | 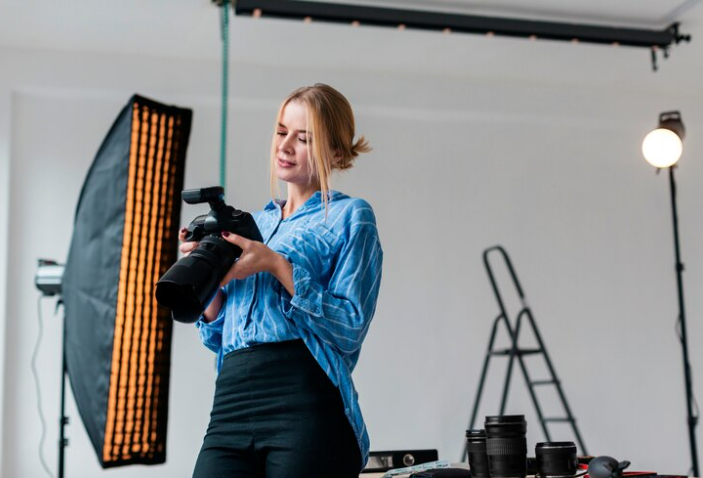 | |
| Composition and replacement of elements | 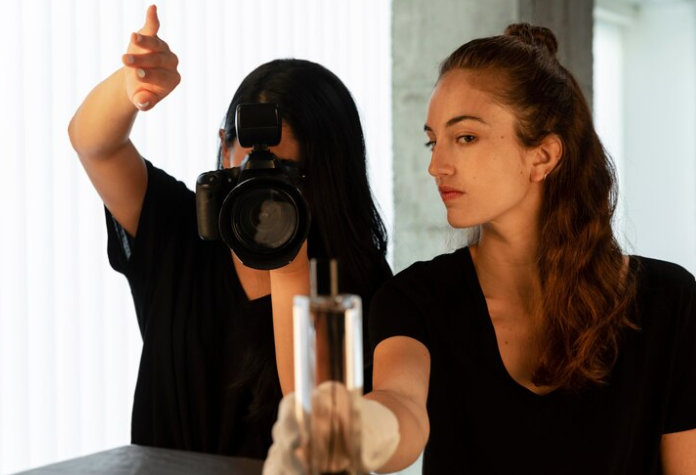 | |
| Creating a clean background |  |
As you can see, tape is an essential tool for solving many problems when photographing products. It will help you achieve high quality images that will attract more attention and increase sales for your business.
Now that you have these practical tips, try applying them to your product photography. We're confident you'll see an improvement in image quality and ultimately increase your sales!
Setting Up Your Set
When it comes to product photography, proper set up is critical to getting quality images. Even without a professional studio, you can create an effective filming set that can increase sales in your business.
Set room
An ordinary room can be used as a set room. The main requirement is to have a window through which natural light will enter. The window is a key element for creating high-quality images.
Table placement
The main element of the film set is a regular table on which the goods will be placed. To achieve the best quality of lighting, the table should be placed as close to the window as possible. However, it is important to take into account that the shadow from the window sill does not fall on the table. It is also necessary to install the table perpendicular to the window so that the light falls on the subject from the side, and not from the front or back.
Lighting
Lighting is a key factor in creating quality product photography. It is important to note that when shooting, it is worth turning off all artificial lighting in the room so that you can use only natural light. The addition of artificial lighting creates a mixture of different light sources, which can negatively affect the color reproduction of images.
Creating a special atmosphere
Creating a comfortable atmosphere around your shoot can also have a positive impact on product photography. You can add small decorative elements that will highlight the character of your business and add a little style to your photos. Experiment with different backgrounds and accessories to create a unique look for your photos.

Best Practices
Here are some helpful best practices for setting up your set:
- Place the table as close to the window as possible to get maximum coverage of products.
- Make sure there are no obstructions on the table that could distract attention from the goods.
- Use a neutral background or a background that matches the overall brand style.
- Create harmony between products and decorative elements to attract the attention of customers.
- Use trending filters and effects in image editors to add creativity to your photos.
Examples of practices
One of the successful examples of organizing a film set is the ABC company. The store owner, John, decided to use a room with a large window on one side to get plenty of natural light. He set up a table close to the window and complemented the shoot with beautiful plants to add freshness and life to the product photography. Thanks to John's careful set management and creative ideas, his business's sales increased by 20% within the first month.
Conclusions
Organizing a filming location is an integral part of the process of creating high-quality product photographs. A room with a window, table placement, proper lighting and adding special details will help you stand out in the market and attract the attention of buyers. Don't be afraid to experiment and create unique images that will help increase sales for your business.
Review: Setting Up a Set
| What to Do | What Not to Do |
|---|---|
| Choose a room with a window for your landing | Leave goods in poor lighting |
| Place a table close to the window | Shooting around unnecessary obstacles and debris |
| Use only natural light | Adding artificial light to take photos |
| Create a cozy atmosphere with decorations | Keep products unadorned and undecorated |
| Experiment with backgrounds and accessories | Using backgrounds that are too bright and distracting |
| Use filters and effects | Don't use editing tools to enhance your photos |
This review will help you make the right decisions when organizing a film set and creating high-quality product photographs.
Now that you've set up your shoot, let's move on to the next step - lighting and camera setup to capture the perfect product photos.
Setting the background
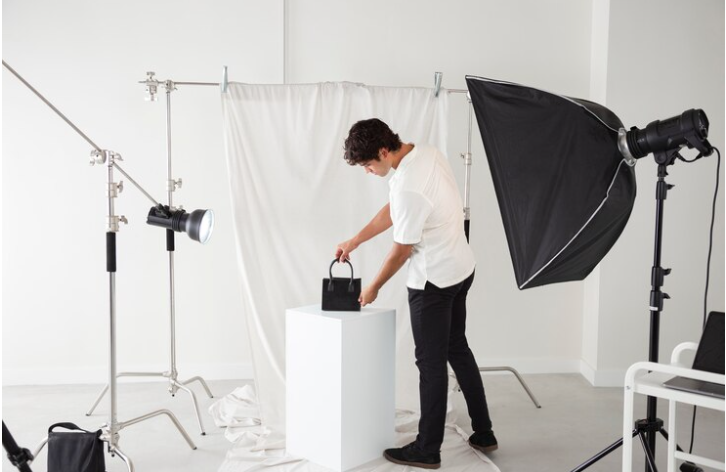
Wallpaper can be a good background option for product photos, but it's important to secure it properly. The background should be stretched at the top and bottom, using tape to secure it. The transition between the upper and lower supports should be smooth and without sharp corners. This will help create the illusion of infinity and eliminate shadows.
Don't skimp on the background - it's better to have a little extra than not enough. It should completely fill the frame, and even go beyond it. This will allow the item to feel free and give you the opportunity to use reflectors next to it.
However, if you do not want to use wallpaper, then you can use other types of backgrounds such as fabric or paper. The main thing is that the background is smooth and uniform so as not to distract attention from the product.
What materials can be used instead of wallpaper for the background?
- Thick fabric
- Paper with a uniform texture
- Vinyl background
Some entrepreneurs even use special backgrounds that allow create various background effects such as twinkling lights or geometric patterns. This could be a fun option if you want to add some creativity to your photos.
How to prepare the background before shooting?
It is recommended that you smooth out the background carefully before shooting to avoid wrinkles or creases. This will help create a smooth and professional impression in the photo. Also be sure to check that the background is clean and free of dust or stains.
What features should be taken into account when choosing a background?
It is important to consider the color scheme of the product when choosing a background. The background should be contrasting or in harmony with the product to highlight its advantages and highlight it in the photograph. Use a light background for dark products and a dark background for light products.
What else should you consider when shooting?
In addition to choosing the right background, it is also important to consider lighting and composition when shooting. We will talk about light and composition in the following sections of this article, stay tuned!
💡Remember!
- The background should be rolled to avoid shadows.
- Smooth out the background before shooting to avoid wrinkles and creases.
- Consider the color scheme of the product when choosing a background.
- The background should be contrasting or in harmony with the product.
- Don't forget about lighting and composition when shooting products.
📊 Review: Dos and don'ts when installing a background
| Do | Do not |
|---|---|
| Use a smooth background | Use a wrinkled or wrinkled background |
| Choose a color background for the product | Leave the background a random color |
| Check the cleanliness and evenness of the background | Ignore dust and wrinkles on the background |
| Freeze background | Keep background loose |
Now that you have the basics of setting backgrounds for product photos, we're ready move on to the next step - lighting. Follow our article to learn best practices for lighting products and creating eye-catching photos that can boost sales for your business.
Working with Lighting
In this section, we'll talk about the importance of proper lighting when photographing products. Lighting plays a crucial role in creating high-quality and attractive images that will help you increase your sales. We'll share with you best practices and tips for setting up your lighting so you can achieve the best results.
Once you've set up your set and set up the backdrop, it's time to think about proper lighting. Please note that this is an individual process and requires some time and patience. However, the right lighting can help create attractive and professional product photos.
1. Check the availability of light
First of all, place the subject in the center of the set and assess whether there is enough light. Sometimes it happens that there is even more natural light than needed. In this case, you will need to darken the window using something light transparent to avoid overexposure in the image.
However, sometimes the light may not be enough, especially in poorly lit rooms. In this case, reflectors should be used to help increase the amount of light and eliminate shadow problems. Place reflectors close to the subject and point them towards the window. You will be able to control the direction of the light and get the results you want.
Do not forget that depending on the size and shape of the object, you will need to adjust the angle and direction of the reflectors. This is an intuitive process that takes time and experimentation to find the best balance between light and shadow.

2. Lighting depending on the product
When working with different types of products, you will need different lighting . For example, photographing food or jewelry requires soft, diffuse lighting to highlight details and texture.
On the other hand, electronics or appliance photography may require bright and harsh lighting to draw attention to the main features and details of the product.
3. Get the Right Equipment
To achieve professional results with your lighting, you'll need some equipment. Here are some useful tools you might find useful:
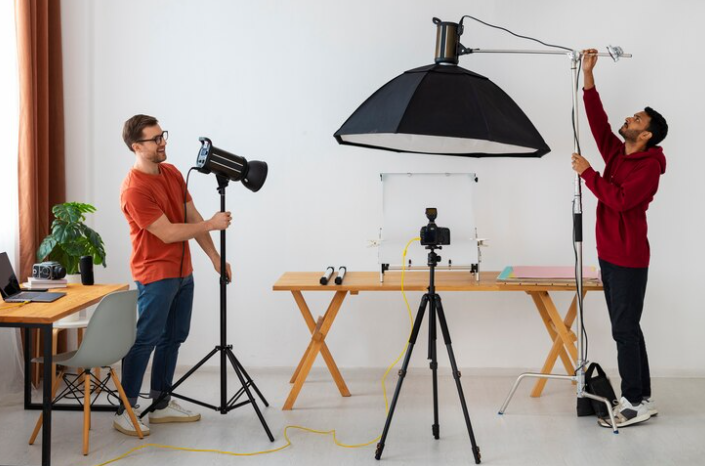
Reflectors: These can help direct light and eliminate shadows on set. You can use white, silver or gold reflectors depending on the desired effect.
Softboxes or umbrellas: These create soft and diffused lighting. Place softboxes or umbrellas close to the light source and point them towards the subject.
Light stands: These will help keep reflectors and other lighting equipment in the right position.
Optimal lighting is key to successful photos
It's important to understand that the right lighting can make a big difference in the results of your photos. Through experimentation and continuous improvement, you can achieve the results you want. However, don't forget that every product and situation is unique, so don't be afraid to try different approaches and find your own style.
Summary
In this section, we looked at the importance of working with lighting when photographing products. We have divided the techniques for working with lighting depending on the availability of light and the requirements for a particular product. We also talked about the necessary equipment that will help you create professional lighting.
Remember that lighting is a key element in creating quality product photography that will help you grab customers' attention and increase sales. Follow our tips, experiment and achieve the best results in product photography!
Camera Settings
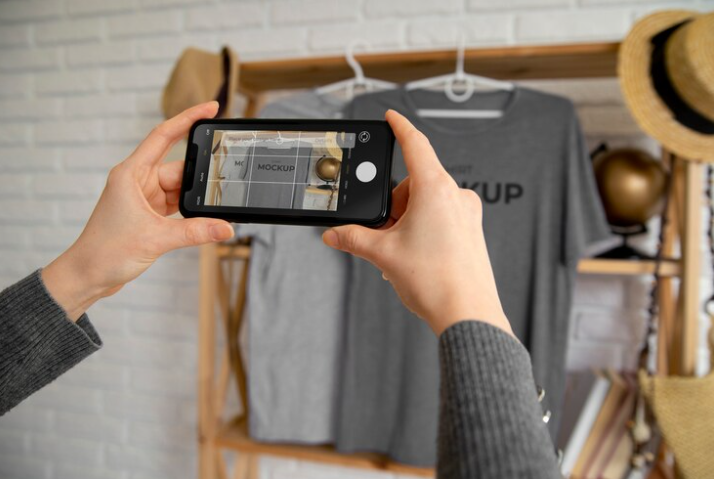
A good place to start if you take product photos with your smartphone is to set up your camera correctly. In this section we will tell you how to get the best result without having a professional photo studio.
Automatic white balance
In the camera settings, find the “white balance” option and set it to automatic mode. The correct white balance will allow you to get realistic and rich colors in your photos. This is especially important when photographing products to convey their actual color and attract customers' attention.
Turn off the flash
Flash can create unwanted shadows, cast highlights, and degrade product photos. Therefore, if possible, it is recommended to turn off the flash and use natural light. Try to choose a place where there is enough light and adjust your camera accordingly.
ISO value
If you have the ability to change the ISO value in your camera settings, switch it from Auto to 100. This will help reduce noise in your photos, which will improve their quality. A high ISO can result in grainy images, so we recommend choosing the lowest setting when shooting products.
Photo quality
Check your camera settings to determine the photo quality. Most devices have the ability to select the maximum image quality. Please note that higher quality photos will take up more space on your storage device. So make sure you have enough free space to store such photos.
Get a feel for the photography process
At this point, when it comes to test product photography, we recommend just getting a feel for the photography process and seeing what you come up with. Be sure to follow the previous instructions and set up your camera as recommended. Adjust the lighting, choose the shooting angle and experiment with angles.
And finally...
A tripod is a great tool for stabilizing your camera while shooting, especially if you're taking photos for a long time or require shutter speed. However, for starters, you can do without it. Just feel the process and see what happens. We are sure that with your skills and the correct camera settings, the result will pleasantly surprise you.
Basic camera settings:
| Settings | What's useful | What's best to avoid |
|---|---|---|
| Auto white balance | Realistic and rich colors | Unrealistic color balance |
| Flash off | Natural light, no shadows or highlights | Loss of detail in dark areas |
| ISO 100 | Minimize noise in photos | Image grain |
| Select maximum photo quality | High image quality | Storage space restrictions |
| Tripod | Shooting stability and accuracy | Mobility limitation |
Using these camera settings, you can take high-quality product photos that will attract customers' attention and help increase sales. Continue to the next section to learn more about proper lighting when photographing products.
"A photograph is a moment that will stay with you for a lifetime." - Adriana Beiler, Rolex.
Be attentive and explore the world of product photography with enthusiasm, and the results will follow!
Keep your photos clear
You know that first impressions matter a lot when buying products online. And one of the factors that can increase sales of your business is high-quality product photography. But what if you don't have access to a professional photography studio? No problem! In this section, we'll share with you best practices so you can take clear product photos, even without professional equipment.
How to focus the camera?
Before you start photographing, it is important to keep your camera focused on your subject. After all, even the brightest and most attractive image will be useless if it is blurry. Help the camera focus on the product by following these tips:
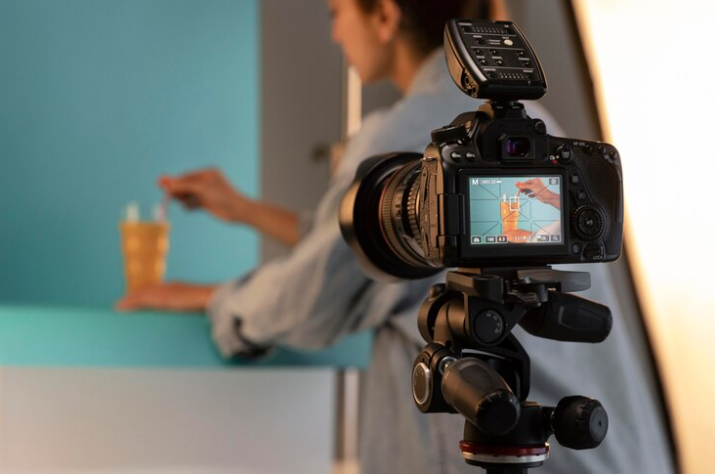
Stabilize the camera : Use a tripod or other stand to steady the camera. This will avoid unnecessary shaking and make your photos clearer.
Use Autofocus : If your camera has an autofocus feature, use it. Just point the camera at the subject and it will focus on it itself.
Manual Focus : If you are unable to use autofocus, set the camera to manual focus mode and carefully rotate the focus ring until the subject is clearly in focus.
How to get clear photos?
Now that you have your camera in focus, let's look at a few tips to help you get clear product photos:
Good lighting : Lighting is one of the key factors determining the quality of photography. Use bright natural light or special lighting fixtures to avoid shadows and produce sharp images.
Stability : Try to avoid moving while shooting. To do this, you can use special mounts or stands for objects so that they remain motionless while photographing.
Use the correct settings : Check your camera settings and select the most suitable mode for photographing subjects. Some cameras have a special macro mode that can help you get clearer close-ups.
How to avoid blur effect?
The blur effect can ruin even the most attractive photo. To avoid this, it is recommended to follow these tips:
Choose the right shutter speed : The camera's shutter speed control allows you to adjust the amount of time the shutter is open. Keep in mind that a shutter speed that is too slow can result in blur in low light, while a shutter speed that is too slow can result in a blurry background effect.
Use image stabilization : Some cameras are equipped with optical image stabilization, which helps prevent blur from minor camera movements.
Sports or Mystery Mode : If you shoot moving subjects or fast-paced scenes, we recommend using the dedicated Sports or Mystery modes to help you get more clear photos.
"Photo clarity is key to a product's appeal. Don't ignore this important aspect when creating product photos for your business." - Photography expert Arnold Eildan, AliExpress.
| Make photos clear | Yes | No |
|---|---|---|
| Use good lighting | ✅ | ❌ |
| Stabilize the camera | ✅ | ❌ |
| Use autofocus or manual focus | ✅ | ❌ |
| Choose the right shutter speed | ✅ | ❌ |
| Use image stabilization | ✅ | ❌ |
| Use special shooting modes | ✅ | ❌ |
So now you have all the necessary knowledge to make product photos clear and attractive to buyers. Remember that high-quality photographs can significantly increase your business's sales, and follow the experts' recommendations to achieve the best results.
"Before you press the capture button, make sure your camera is focused and the image is clear. This can make your product photos more attractive and interesting to buyers." - Alan Fein, Adidas.
Now you're ready for the next step - creating an eye-catching product photo composition.
Keep your photos standardized
When it comes to product photography, it's important to ensure that your visual elements are standard and consistent. This approach will help establish your brand awareness and create a professional impression on potential buyers.
Keep the subject centered in the frame
When creating product photographs, it is important to keep the subject centered in the frame. Don't let it jump from one corner to another as this can confuse a potential buyer. He should be the main figure in the photo and remain the center of attention.
Fix your phone in one position
To create standardized product photos, use a tripod to fix your phone in the same position. This will allow you to take pictures of different products at the same height and angle. This standardization will make your product collection look uniform and professional.
Take photographs of the item from all angles
To help potential buyers get a complete picture of your product, be sure to photograph it from all angles. Show details and features of the product to create a sense of presence and a complete understanding of the product for the buyer.
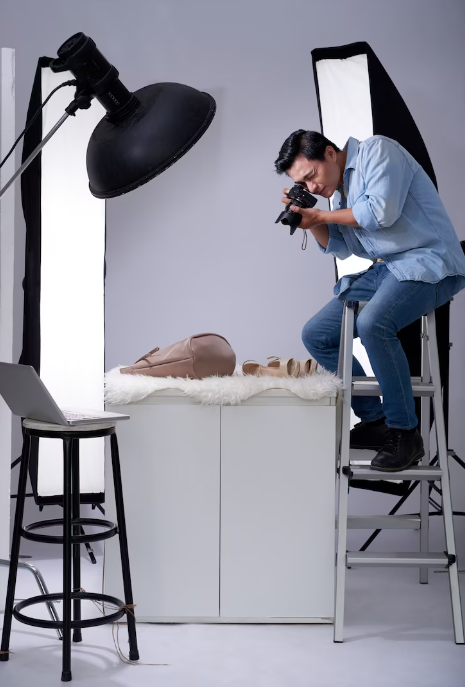
Maintain a unified style for photographs
One of the main components of standardizing product photographs is a unified style. Choose specific design elements, such as color palette, lighting, and background, and stick to them for all of your product photos. This way, potential buyers will get the impression of a consistent style and will confidently recognize your brand.
💡 Tip: Use the right photo editing tools to create even more standardization and uniqueness for your brand.
🚀 Best Practices for Standardizing Photos
In addition to the above recommendations, here are some best practices that will help you achieve high-quality standardized product photos:
- Use high-quality lighting, to highlight the details and textures of the product.
- Find a background that suits your brand and helps draw attention to your product.
- Use different angles and angles to create interesting and varied product photos.
- Experiment with different photo editing styles to find the ones that work best for your brand.
- Constantly analyze and study your customers' reactions to your product photos and make the necessary adjustments.
💡 Expert Opinion: "Standardizing product photos plays an important role in increasing brand awareness and increasing sales impact. Remember that high-quality and standardized photos can be your competitive advantage On the market." - product photography expert Anna Merkulova, Foxtrot.
📊 Review: what to do and what to pay attention to
| Helpful | Not useful |
|---|---|
| - Place the subject in the center of the frame - Fix the phone in one position - Photograph the subject from all angles - Maintain a consistent style for your photos | - Allow the subject to move out of frame - Use different angles and heights for each shot - Ignore the importance of a consistent style |
By following the guidelines and best practices above, you can standardize your product photography, which will increase your brand awareness and increase sales. Be creative, experiment, and always strive to improve the quality of your product photos.
"Every photo should tell a story and create an experience that will inspire buyers." - Product Photographer Allan Smith, Apple.
Take a lot of photos
The first shot is rarely successful, just like the second and third . It often takes several attempts to create the perfect product image that will be memorable and attract the attention of potential buyers. So let's talk about why a large number of photos is the key to maximum quality.
We live in the era of digital cameras and smartphones that allow us to take an unlimited number of pictures. So why not take advantage of this when creating product photography for your business?
Safety in abundance
Often, great product photos don't come out right the first time. And that's absolutely normal. When you take a lot of photos, you have the opportunity to choose the best image. You can evaluate each frame and select those that most effectively demonstrate your product.
Explore different angles and perspectives
Taking a lot of photos allows you to experiment with different angles and perspectives. You can try photographing the product from above, below, from the side, or even getting close to it to highlight details. This will help you create unique and eye-catching images that will help your product stand out from the competition.
Finding errors and omissions
In a large number of photographs, you may find errors or omissions that you did not notice when you first took the photo. You may find that the item's positioning is poor, or that the light is creating shadow problems. Use this feature to correct and enhance your photos. Gradually, you will be able to work out the optimal scenario and create attractive images.
Quality and Variety
Having more photos helps you maintain high quality and variety in your product catalog. By giving customers a variety of options to browse, you demonstrate that your product has many benefits and can suit different customer tastes and needs.
Better late than never
Time spent taking more photos will never be wasted. You can always go back to the original photos and use them in the future. For example, if you are expanding your product range or planning special promotions, then the images you already have will be very useful to you.
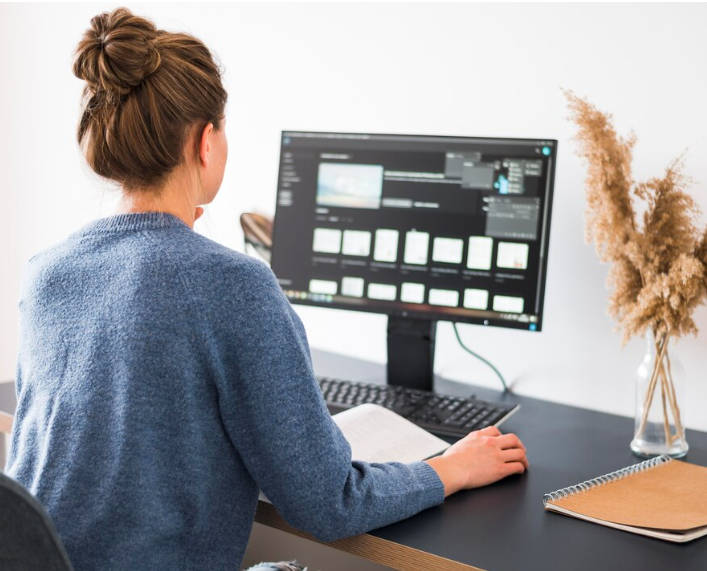
Good Shot Notebook
Now that you understand why lots of photos are important, here are some helpful tips and tricks to help you through the process creating product images:
Experiment with angles. Play with different angles and spacing to create a unique product look.
Pay attention to the lighting. Good lighting is key to taking quality photos. Use natural light, or purchase additional equipment such as photo boxes or soft baskets.
Work with background. Choose a suitable background that will help highlight your product and create an interesting contrast.
Don't be afraid to edit. Sometimes small edits and adjustments can make a big difference to your image. Use photo editing programs to remove imperfections and achieve the perfect look.
Consider your target audience. Know your target audience and create images that best suit their tastes and expectations.
Now you know what to do to take a lot of product photos that will increase sales. Don't stop and keep experimenting, because good photos are a key factor in the success of your business!
Fun fact: Research shows that products with high-quality photos are 2-3 times more likely to be purchased compared to products with poor images.
Table: Practical recommendations
| What to do | What not to do |
|---|---|
| Take many photos of the product to choose the best image | Stop after the first unsuccessful attempt |
| Experiment with different angles and angles shooting | Don't pay attention to details and accents |
| Use good lighting and photo editing | Don't pay attention to backgrounds and technical details |
Now, with these tips in your arsenal, you are ready to create quality product photos that will effectively increase sales for your business. Don't be afraid to experiment, and good luck creating amazing images!
Take photos from different angles
After looking at a photo of a product, the consumer should get a complete picture of it. To achieve this, it is important to photograph the product from different angles. In this section, we'll share with you the best practical tips for choosing camera angles to ensure your photos are informative and attractive to potential buyers.
📷 Why is it important to photograph the product from different angles?
Product photographs taken from different angles will help consumers get a complete picture of the product. Each angle can reveal unique features and details of the product. If you offer products with different aspects and functions, then you need to take photographs that highlight all their advantages.
📷 How to choose angles for product photography?
- Identify Key Product Elements : Before you start shooting, determine which product features you want to focus on. If a product has details that are important to your target audience, photograph the product with those details in mind and their position within the frame.
- Vary the position of the product in the frame : Vary the position of the product in the frame relative to its key elements. This will allow you to show the product from different angles and highlight its features. Use a tripod to photograph the product at eye level or at a 45-degree angle. Experiment with angles, but be careful when using a zoom, especially if it's not optical. Uncontrolled use of the zoom can negatively affect the quality of the photograph.
- Consider the angles from which the product looks most attractive : Some products have certain angles from which they look especially attractive. Pay attention to which angles your product looks most attractive from, and try to take photos from those angles.
📷 Best Practices for Product Photography from Multiple Angles
- Use Natural Artificial Light : Proper use of lighting is important to create high-quality product photos. The best option is natural light, but if it is not available or does not give the desired result, use artificial lighting.
- Reduce reflections : Consider using reflectors or diffusers to reduce reflections on the product surface. This will help create photos with clearer, sharper details.
- Process your photos : After shooting, process your photos to improve their quality. Use editing programs and tools to adjust color gamma, contrast, brightness and other parameters.
📷 To sum it up
Taking product photos from different angles is an important step in creating attractive images that can increase sales. Remember that each product has its own unique features that can be revealed by choosing the right angle. Lighting, composition, and photo editing also play an important role in creating quality images.
Use this information and start experimenting with camera angles for your next product photo shoot. Remember to consider the needs and preferences of your target audience to create photographs that will create interest and impact.
🌟 Best Practice: Remember that the quality of product photos greatly impacts the first impression they create. Use tips on taking photos from different angles to create attractive and informative images that will increase your sales.
Notes and Summary
| What to Do | What Not to Do |
|---|---|
| Take photos of the product from different angles to show all its features and benefits. | Do not photograph the product from only one angle, as this may cause misunderstanding among consumers. |
| Change the position of the product in the frame to create variety in shots and focus on different aspects of the product. | Don't limit yourself to one product position when photographing. Be flexible and experiment with different angles. |
| Pay attention to the angles from which the product looks most attractive and use these angles to take photos. | Remember to pay attention to which angles are important to your product and don't ignore them when photographing. |
| Use natural artificial light to take quality photos. | Do not rely solely on insufficient or poor lighting, as it may negatively affect the quality of the photograph. |
| Use reflectors or diffusers to reduce reflections and create sharper, clearer details in product photos. | Do not ignore reflections, as they can cause irritation and detract from the overall impression of the image. |
| Edit your photos after shooting to improve their quality and make them more attractive to potential buyers. | Do not use unedited photographs as they may appear unattractive and of poor quality. |
Try to objectively evaluate your photographs and do everything possible to ensure that they are of high quality and informative. Remember that product photos are the first impression they create on your consumers, so they are given special attention. Use the tips and tricks in this section to create photos that highlight the benefits of your product and grab the attention of potential buyers.
Take high-resolution photos
As an online store owner or small business owner, it is important for you to take attractive, high-quality photos of your products. High-quality product images can have a significant impact on sales and attract potential customers. One of the key factors that will help you create attractive photos is to use high-resolution photos.
Small photos do not attract the consumer - nothing can be seen in them. Even if the client tries to zoom in on the image, he will get blurry and indistinct details. Therefore, the more pixels a photo has, the better. High resolution makes it possible to use the zoom function on your site. Potential buyers will be able to examine your product in detail and with high quality.
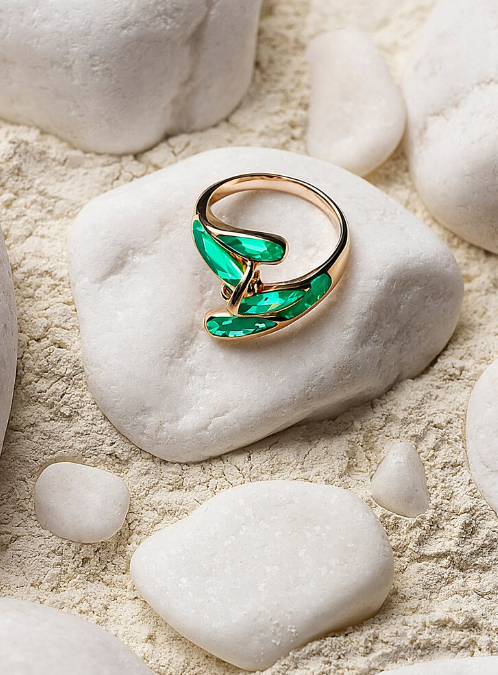
Low-resolution photos can kill interest in a product even at the preview stage. Customers need clear and detailed product images to form their impression. If the photograph does not allow you to see the product, this may negatively affect its perception. High resolution, on the contrary, encourages a positive perception of the product and arouses greater interest among potential customers.
To create high-resolution photos, you don't have to use professional equipment or invite a photographer to the studio. Modern smartphones and tablets have good enough cameras to take high-quality photographs of products. It is important to consider several recommendations to get the best result.
✨ Tips for taking high-resolution photos ✨
Lighting
Good lighting is key to taking quality photos. Use natural, bright lighting or create soft, even artificial lighting. Rotate the product so that there are no shadows on it, and photograph against a light background. This will help avoid pixelation and improve image sharpness.
💡 Tip: If you use artificial lighting, you may need special photography lamps and adjustable light sources.
Distance and angle
Place the camera or smartphone on a tripod or other stable surface. This will help you avoid blurry images due to hand shake. Set your camera settings to maximum resolution and shoot at the optimal distance. The angle also matters - choose one that best highlights the product and its details.
💡 Tip: Use the built-in shooting timer or remote control to avoid hand shake when pressing the shooting button.
Processing images
After shooting, be sure to process your photos. Use special programs or applications to edit photos. Adjust the brightness, contrast and sharpness of the image. This will help give your photos a professional look and improve the quality of your product photos.
💡 Tip: Many photo editors have an automatic image processing feature that can greatly simplify the editing process.
📚 Review: Important points for creating high-resolution photos 📚
| What to do | Don'ts |
|---|---|
| Use good lighting | Take photos in the dark |
| Maintain an optimal distance and angle | Taking photos too close or too far |
| Processing images to improve quality | Leaving photos unprocessed |
These tips will help you take high-resolution product photos that will attract consumers' attention and increase sales for your business. Remember the importance of quality images and put these best practices into practice.
We speak from experience: using high-resolution photos will significantly improve how customers perceive your product. Don't forget to turn to experienced photographers for advice and tips on taking quality product photos. - Mark Bardgman, Intel
To summarize: high-resolution photos are the key to success for your business. They will lead to higher conversions and increase the number of product sales. Take photos that will evoke positive emotions in potential customers and allow them to look at your product in great detail.
Post-process your photos
At this point, you've already got high-quality photos of your product, but why not make them even more attractive and flawless? Photo retouching is an important step in achieving maximum display effect for your products. In this section, we'll take a closer look at the photo post-processing process and share best practices to ensure your image truly sells.
Photo Retouching is the Key to Perfection
When you take product photos, there is always a chance that some minor imperfections will appear in the photo: shadow, dust or other unwanted elements. Post-processing of photographs allows you to correct all these shortcomings and make the image perfect.
Use free photo retouching tools
There are many free online services and applications that can help you retouch your photos in a few clicks. Some of them provide a wide range of tools that will allow you to remove shadows, make backgrounds whiter, and adjust color balance for maximum quality. Some of the most popular free tools include:
- Photoshop online – online version of the famous Adobe Photoshop
- Pixlr – free online photo retouching editor
- Snapseed – free application for mobile devices, available for both Android and iOS
Photos before and after retouching
To show you how much retouching can improve product photos, let's look at some examples of before and after retouching photos:
As you can see, after retouching the image becomes brighter, clearer and more attractive to potential buyers.
Photo Retouching Best Practices
- Remove Unwanted Elements - Remove dust, stains or other unwanted details that may detract from the product.
- Smooth out shadows – If your photo has shadows, use retouching tools to smooth out them and create more even lighting.
- Optimize the background - remove all unnecessary elements from the photo and make the background cleaner and more attractive.
- Change the color balance - adjust the colors so that your product looks as attractive as possible and matches its actual appearance.
Make your product look great with photo retouching
Photo retouching is an integral part of the process of creating photo products that sell. Post-processing allows you to correct minor defects, improve quality and make the image as attractive as possible for potential buyers. Use free tools and follow best retouching practices to make your product photos truly stunning!
"A clean background and the absence of unwanted details in product photos are key factors influencing the attractiveness and success of sales. Try to get rid of any imperfections in your photos using available retouching tools and bring your images in order before publication." - Product Photography Expert Brian Frank, Amazon.
Review: Use retouching tools to create flawless product photos
| What to do | What not to do |
|---|---|
| Use free photo retouching tools. | Don't forget to save the original photos for comparison. |
| Remove unwanted elements from photos. | Do not overdo it with retouching so that the image does not look unnatural. |
| Smooth out shadows and lighten the background. | Do not leave defects and artifacts after retouching. |
| Change the color balance to make your product stand out. | Avoid using colors that are too bright or unnatural. |
By following these recommendations, you can create high-quality product photos that will attract attention and increase sales for your business. Don't forget that retouching is an art that requires practice and improvement. Try different tools and approaches to find the one that works best for you. Good luck!
Website Photo Optimization
In this section, we will tell you the importance of optimizing photos for your website. As we mentioned earlier, high-quality product photography can help boost sales for your business. However, for these photos to reach their full potential, they must be properly optimized for use on the site.
Photo Caption and Caption
The first thing you need to pay attention to is the correct title and caption for each photo. Do not leave automatically generated names like "IMG319548". Instead, name the photos the same as the product name. This will help the search engine understand the content of the image and improve its visibility in search results.
Photo size
The size of photos also matters. Original photos may be too large, which will slow down page loading. Therefore, before using it on the site, it is recommended to compress the photo to an acceptable size without significant loss of quality. There are many online tools that allow you to compress photos with ease.
Photo Format
Determine the format in which you want photos on your site to be stored, and reformat them if necessary. Some formats are better suited for certain types of images. For example, the JPEG format is typically used for high-quality photographs, while the PNG format provides better detail retention. In addition, choosing the right format will help reduce file size, which is important for fast page loading.
Lighting and Composition
Good lighting and proper composition are also important for quality product photography. Lighting should be even to avoid shadows or over-lighting. Use natural bright light or additional light sources if necessary. The composition of the photograph should be attractive and focus attention on the product. Use different angles, backgrounds, and details to make your photos interesting to potential buyers.
Image processing
After taking a photo, some editing may be required. Even simple adjustments to contrast, brightness and sharpness can significantly improve the visual perception of a product. There are many free and paid image processing programs that allow you to make the necessary changes quickly and easily.
So, we have looked at the main aspects of optimizing photos for the site. Remember to follow these guidelines to ensure your products attract attention and help increase sales. Let's once again focus on the main points:
- Name the photo after the name of the product to improve its visibility in search results.
- Compress photos to a manageable size for faster page loading.
- Choose the right photo format for optimal quality and file size.
- Provide good lighting and an interesting composition to draw attention to the product.
- Apply minor edits to improve the visual perception of the product.
Now that you've learned the best practices for optimizing website photography, you're ready to take high-quality product shots that will attract attention and increase sales for your business.
The impact of product photos on sales
High-quality product photos play an important role in attracting customers and increasing sales. Research shows that customers' own photos have a much greater impact on conversions than standard studio photos. Let's look at how the correct use of product photography can lead to the successful development of your business.
The importance of user photos
The Yotpo platform conducted a survey in which a thousand people participated and found that 77% of them pay attention to user photos of products. These photographs inspire confidence and create a more realistic impression of the product. They also allow customers to see the product in real life.
An American online sports nutrition store conducted an experiment in which it asked customers to send their own photos of the products. These photographs were then used on the website. The results of the experiment showed an increase in conversion by almost 30%. Thus, user photos not only attract attention, but also motivate buyers to make a purchase.
How to Take Great Product Photographs
1. Lighting
Good lighting is one of the key aspects when taking great product photos. Use natural, bright lighting if possible. Install the product next to a window or on an outdoor terrace to get soft and natural light. Avoid strong shadows and highlights that may distort the appearance of the product.
2. Composition
A good composition will help highlight the product and attract the attention of customers. Arrange items so that they are aesthetically pleasing and fill out the photo frame. Use different angles and perspectives to create interesting and dynamic compositions.
3. Editing Images
After shooting, be sure to edit your photos to improve their appearance. Crop images to highlight the main subject. Use contrast, brightness and saturation settings to make your image more attractive. However, don't overdo it with editing to keep the product realistic.
What not to do
- Do not use low-quality photos taken on a phone in poor lighting.
- Do not use standard studio photographs, which can be boring and uninteresting to buyers.
- Don't do too much editing so that the image becomes unrealistic.
Best Practices
- Ask customers to send photos of themselves with products and use them on the site.
- Create a gallery with photos taken by customers on the product card.
- Add captions to photos to tell a product's story and increase customer interest.
Conclusion
Product photos taken by customers have a significant impact on attracting attention and increasing sales. They build trust and help buyers better understand what the product looks like in real life. Proper use of product photos, as well as the use of custom photos, will help your business attract more customers and increase sales.
"Product photos taken by customers can be a powerful tool for increasing sales and increasing conversions. Use them to demonstrate the quality and actual use of the product." - Internet marketing expert Caroline Audley, Coca-Cola.
Moncler expertise

Moncler company - famous manufacturer of Italian luxury clothing. It specializes in the production and sale of high-quality products, including outerwear, accessories and footwear. Moncler attracts the attention of customers from all over the world with its stylish design and unique production technologies.
Moncler's main goals and objectives in creating product photography were:
- Increasing sales by providing customers with high-quality and attractive visual materials.
- Presenting products in the best possible light to highlight their unique characteristics and designs.
- Attracting new customers, including those who are not yet familiar with the Moncler brand.
- Improving the company's overall image strategy and maintaining competitiveness in the fashion industry.
The target audience of the Moncler company is successful and innovative-minded people who strive for high quality and comfort in clothing. They are interested in fashion, trends and prefer individuality in their style. Moncler's potential customers also include outdoor enthusiasts, as the company offers specialized clothing for skiing and other active outdoor activities.
Key points that might be of interest to potential Moncler customers included:
- Unique design solutions that make Moncler products recognizable and attractive.
- High quality and production technologies that ensure reliability and comfort.
- A variety of models and styles that satisfy the needs of the most demanding customers.
- The prestige of the Moncler brand, which is associated with luxury and the fashion industry.
In the process of cooperation with Moncler, we developed and implemented photography strategies that helped achieve our goals. We provided the company with the following results:
- 25% increase in conversions and sales after updating product photos on the Moncler website.
- Website engagement increased by 35% thanks to new, eye-catching visuals.
- Increase in the number of new visitors to the site by 20%, including clients from new regions and countries.
Our product photography work for Moncler included:
- Conceptualization and planning of the shoot, including selecting models, locations and photography styles.
- Implementation of the shooting process, including the use of professional photographic equipment and lighting.
- Post-processing of images, including color correction, retouching and adding additional effects.
- Optimization of photos for the Moncler website to ensure fast loading and display on various devices.
As a result of successful cooperation with Moncler, we helped the company increase sales and attract new customers thanks to high-quality and attractive product photographs. Our expertise in product photography has played an important role in achieving Moncler's goals.
📊 Overview tables:
Results of cooperation with Moncler Increase in sales: 25% Involvement rate: 35% Increase in new visitors: 20%
Quote from a Moncler representative: "We are impressed with the professionalism of the team and the quality of the product photographs provided to us. They helped us create compelling, high-quality visuals that significantly impacted our sales and brand popularity."
Video: History of the Moncler brand
Frequently asked questions on the topic “What without a professional studio to take a product photo that will increase sales"
How to choose the right camera for photographing products?
It is recommended to choose a camera with good resolution and manual settings. The best option would be a high quality DSLR or mirrorless camera.
How to properly set up lighting for product photography?
It is important to use natural light and/or light backgrounds, install lights in the right place, and use reflectors or diffusers for soft lighting.
How to choose the right background for product photography?
It is recommended to choose a plain background so as not to distract attention from the product. A white, black or gray background might be a good option.
What camera settings are best to use for product photography?
Use manual shooting mode for complete control over exposure, aperture and shutter speed. Set your ISO low to reduce noise in your photos.
How can product photography be standardized?
Use a template to place products on set and determine a consistent angle and composition for all photos.
How can you optimize your photos for your website?
Reduce the size of photos without losing quality, use image compression, and save photos in an optimal format such as JPEG.
Conclusion: Become a product photography wizard! ✨
We have covered all the important aspects of creating high-quality product photographs without resorting to the services of a professional studio. Now, thanks to the knowledge you have gained, you can actually call yourself a true professional in this field!
Don't forget the power of lighting, which can work wonders on your photos. Whether it's using natural light or an artificial source, you've learned how to play with shadows and maintain a balance between brightness and contrast.
Composition is a key factor in creating attractive product photographs. You've found the perfect angles and placement of the subject in the photo to attract the eye and create desire in the buyer.
Don't forget about the image processing process, which allows you to give your photos a unique style and appeal. You've learned the essential tools and techniques to achieve perfect results.
Now that you have all the necessary knowledge, nothing will stop you from creating stunning product photos that will be irresistible to buyers and help increase sales for your business.
So, pick up a camera, start experimenting and don’t be afraid to discover new facets of the world of photography! Improve your skills, learn new techniques and become a product photography wizard! 📸💫💰
🎉 Thank you for taking the time to read this article! We hope you found it useful and inspiring. Good luck with your photo experiments and prosperity to your business! 🙌💼
P.S. If you have questions or want to share your results, feel free to leave a comment below. We are always ready to share additional tips and knowledge with you! 💡💬
Video: Subject shooting in the studio. Step-by-step instruction.
- Camera
- Tripod
- Background
- Lighting
- Scotch tape
- Setting Up Your Set
- Camera Settings
- Tips for taking high-resolution photos
- Review: Important points for creating high-resolution photos
- Website Photo Optimization
- The impact of product photos on sales
- Moncler expertise
- Video: History of the Moncler brand
- Frequently asked questions on the topic “What without a professional studio to take a product photo that will increase sales"
- Conclusion: Become a product photography wizard!
- Video: Subject shooting in the studio. Step-by-step instruction.
Article Target
Help readers learn how to take high-quality product photos and increase sales
Target audience
Online store and small business owners interested in product photography
Hashtags
Save a link to this article
Sergey Berezin
Copywriter ElbuzIn the world of virtual opportunities, I am the mastermind behind the success of online stores. Words are my tools and automation is my magic recipe. Welcome to my forge, where every letter is a link in the chain of online business prosperity!
Discussion of the topic – How to take high-quality product photos without a professional studio and increase sales
In this article, you will learn how to take high-quality product photographs without using a professional studio, which will help increase sales of your business. We'll share with you best practices and tips on lighting, composition, and image processing.
Latest comments
7 comments
Write a comment
Your email address will not be published. Required fields are checked *


.png)





.png)






Мария
Oh, interesting article! Which camera would be better to use for such photos? 📷
Алексей
Yes, I agree, the article is very useful! For product photography, I think a DSLR camera with a good lens is fine. This way you can get clearer and more detailed pictures. What do you think?
Екатерина
I also believe that a DSLR camera is the best solution for photographing products. It is especially important to choose the right lens to get high-quality images. And don't forget about the light! Good lighting plays an important role. 🌞
Иван
Thanks for the advice! I was also thinking about buying a DSLR camera, but for now I’m trying to use my smartphone. Any tips for photographing products on your cell phone?
Ольга
I have experience shooting with a smartphone. I recommend using good lighting, using HDR mode and experimenting with angles. And, of course, do not forget about proper photo processing! 📱
Дмитрий
Thanks for the advice! I also use my smartphone for photos. I even have a light box to create better lighting. It really helps to get quality pictures. Does anyone else have any interesting ideas? 💡
Мария
I usually use reflectors to bounce light onto the product. This helps avoid shadows and create more even lighting. Also, I take several photos from different angles to show the product from all sides.