How to create a product catalog for an online store manually
If you do not yet have a catalog of categories either in the online store or in 1C or any other accounting system, you can create it from scratch in the Base Catalog. Otherwise, you definitely need to transfer it to the program for data synchronization.
BC can be created based on the import of data from the online store, 1C, MySklad and other accounting systems.
It is from the BC that data is uploaded to the site, 1C, MySklad and other accounting systems, including universal XML and csv formats for trading platforms such as YandexMarket, hotline.ua, google, GoodsMailRu and others.
From the base catalog, you can get a summary table of data on availability and prices from various counterparties in Excel (.xlsx) format. You can create a price list for the client, which will include his personal discounts.
Let's look at an example of how to create a category directory from scratch. To do this, go to "Directories" - " Categories "
1. Creation of product categories for the base catalog.
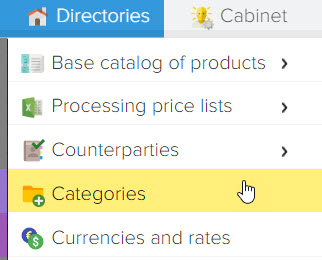
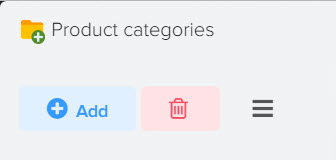
And create the desired hierarchy of categories and subcategories. In order to create the main (parent) category, you need to go to the "List of categories" and click the "Add" button ![]()
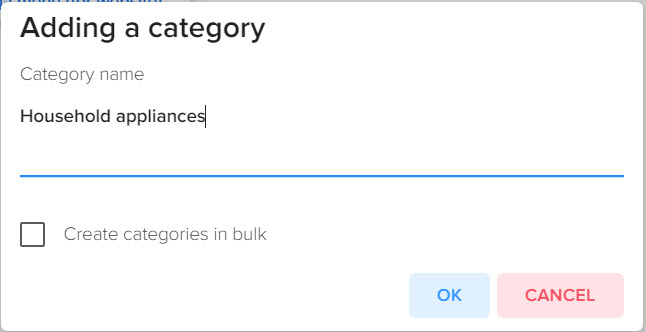
In the window that opens, enter the name of the parent category that you want to create and click the "OK" button.
Then do the same for all the desired categories that you want to create.
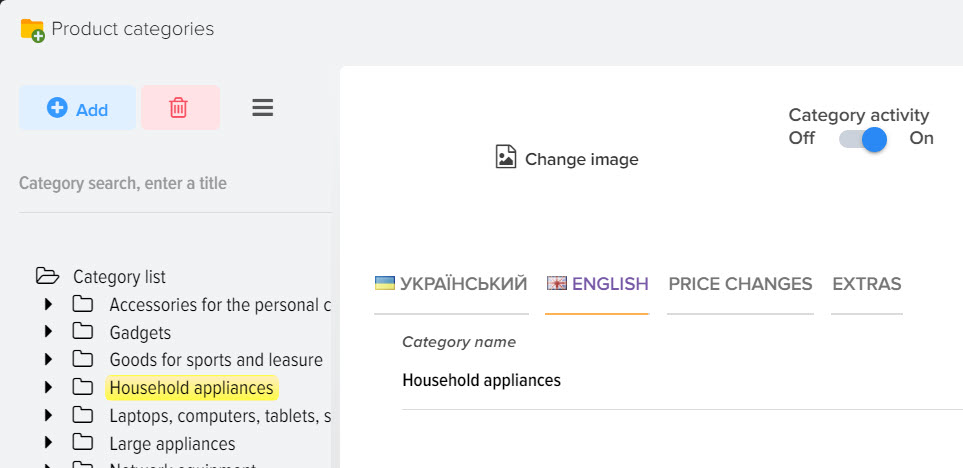
To create a subcategory (child category), you need to stand on the name of the category (parent category) and click the "Add" button. In the window that opens, enter the name of the subcategory and click the "OK" button.
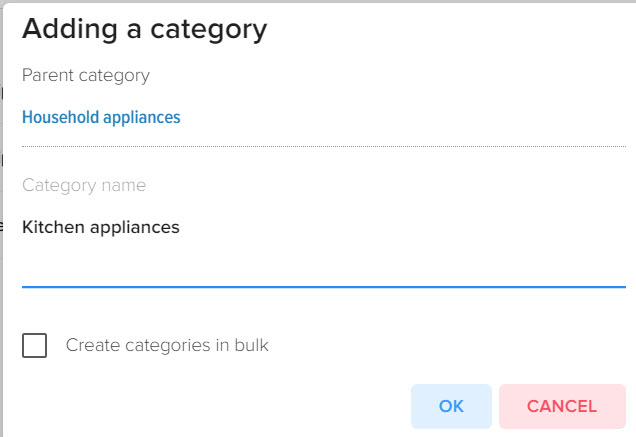
Do this for all categories that you want to see in your base directory.
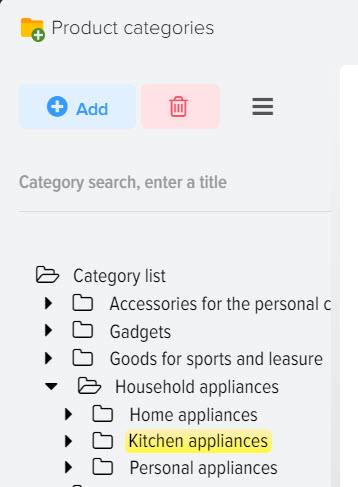
Then you can load products from the price lists of your counterparties into them.
2. Adding a counterparty and a price list.
The second stage is adding a supplier and attaching a price list to it for further customization.
To add a price list, you need to create a counterparty and attach a price list to it.
To do this, go to the "References" tab, select "Price list processing" - "Price list list".
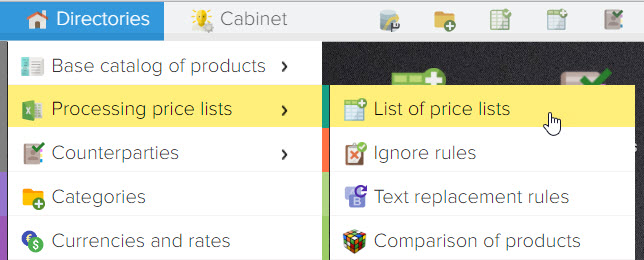
Or click on the "Price Lists" icon on the desktop.
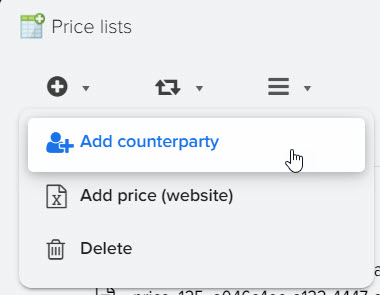
To add a counterparty, click on the button![]() in the upper left corner and select "Add counterparty"
in the upper left corner and select "Add counterparty"
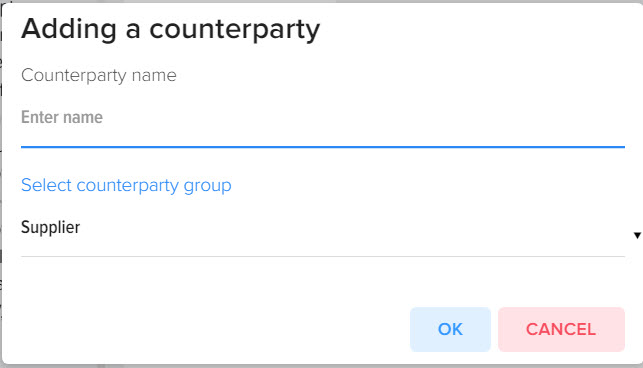
In the window that opens, enter the name of your counterparty and click the "OK" button.
Then you need to add the price list of the counterparty.
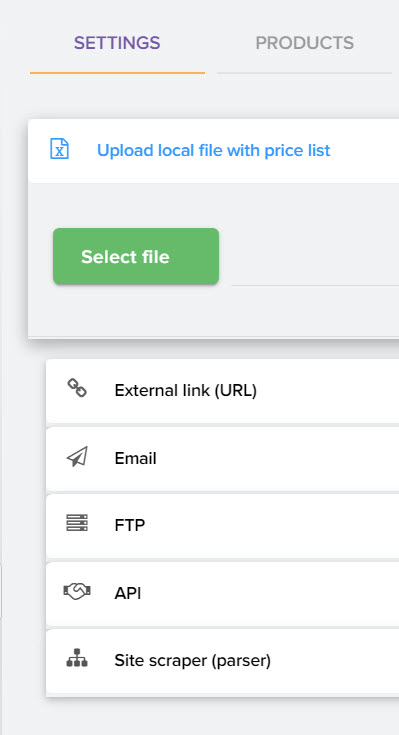
Available ways to add:
Locally from your computer, download from the Internet using the link, set up downloading a price list from e-mail, download a file via the ftp protocol, select a price list from those connected to the program via API.
You can learn more about each item in the "Price lists" - "Download settings" - "Adding a price list" section.
Next, you need to start determining the addresses of the columns based on the data from the price list.
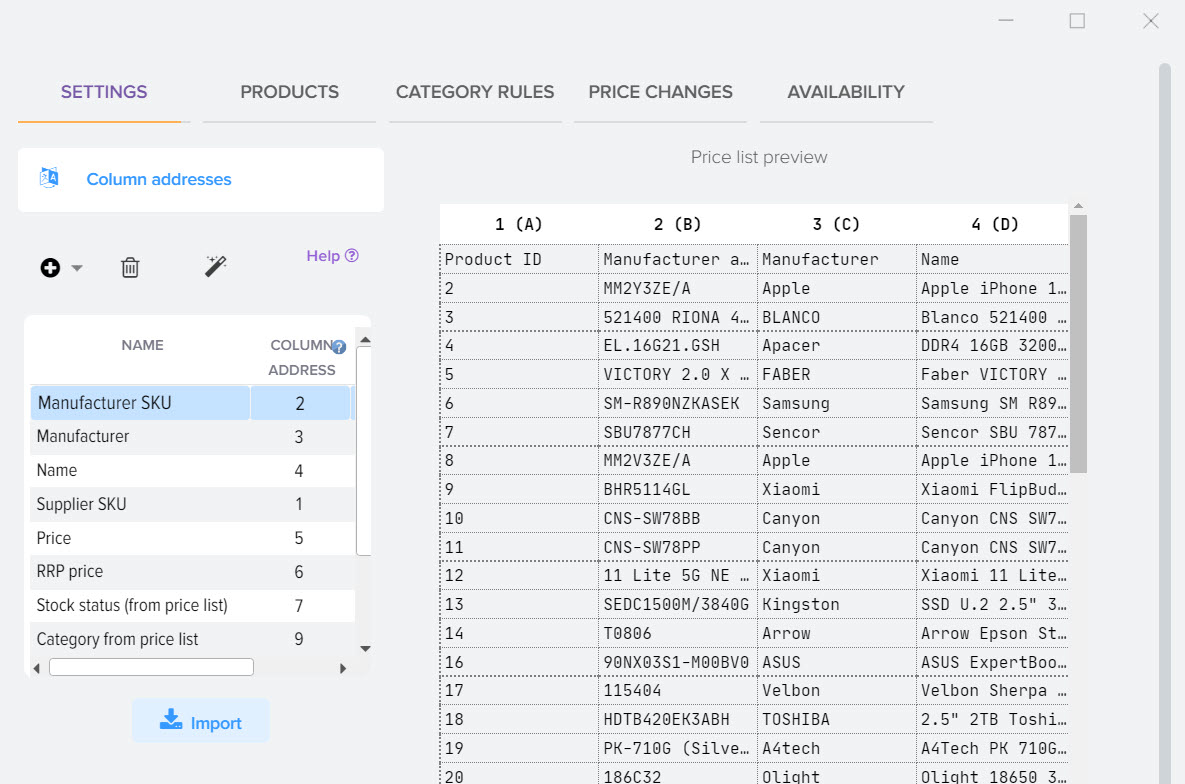
The price list preview will be available on the right side.
Mandatory fields to fill in:
"product name" and "price", the rest can be filled in as needed and the presence of these columns in the price list itself.
3. Definition of product categories.
If there are product categories in the price list, then the column from the price list that contains the "product category name"
it is necessary to register in the corresponding field the settings of the address of the columns.
You may need additional settings to determine the category of products from the price list.
It all depends on the structure of a particular price list.
Additional settings for determining the category of products can be done in the section "Advanced" - "Defining categories"
You can learn more about defining categories in "Price lists" - "Download settings" - "Advanced" - "Defining categories".
4. Loading data from the price list
After the column addresses are configured, you must click the "Load data" button to load data from the price list
to the program.
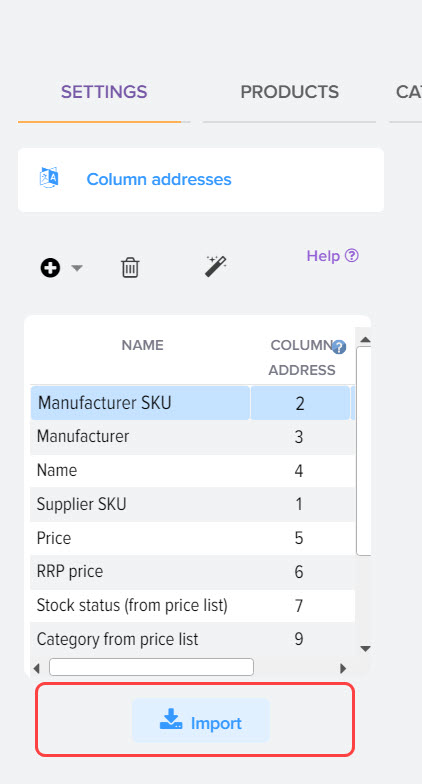
You can also go to the "Downloaded Products" tab and click the "Download Data" button.
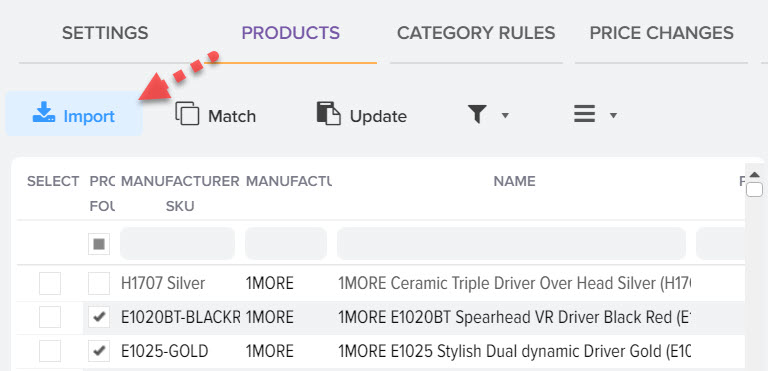
Thus, the products from the price list will fall into this window based on the settings made earlier. If all the settings are correct, then after loading the data you will see the data from the price list in this window.
In the same window, you can check the correctness of the definition of categories and other data.
5. Setting up rules for loading products from the price list.
The next step is the "Loading Rules" they are created so that the products from the price list are distributed by category
from your accounting system (reference catalog), which you transferred to the program in the Base Catalog (BC) based on the data from the price list.
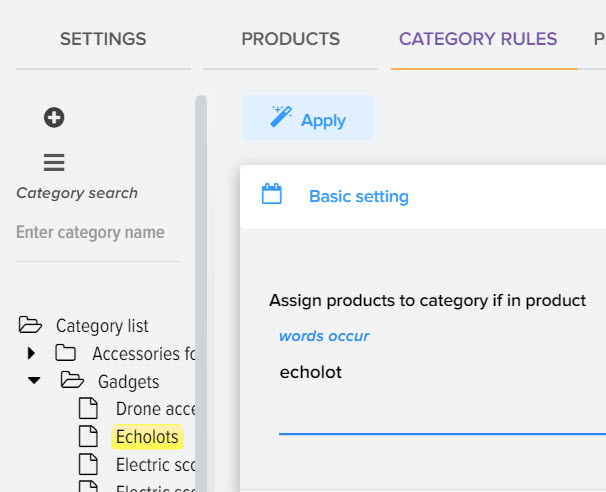
If the category definition settings are correct, you will find the list of categories from the price list by clicking the "Comparisons by category" button in the upper right corner of the "Loading rules" tab after selecting the categories for which rules will be created for transferring products from the price list to the program. For this button to appear, you need to be on the "List of categories" or any other category.
Next, in this window, you need to select a category from the price list from which you want to download products and become a category from the base catalog,
where you want the products to be distributed from the price list and click the match button.
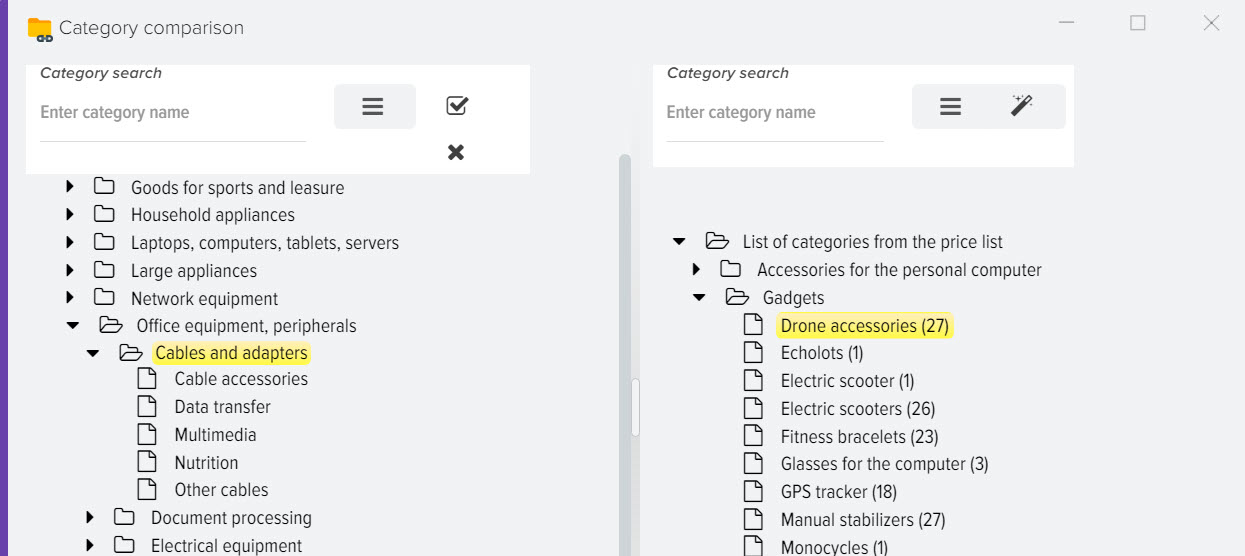
This creates a "load rule".
To apply the created download rules after matching categories, you need to close this window and you need to load data by clicking on the "load data" button from the "Imported products" tab.
As a result, you will see a list of products from the price list, which will have a category from the Base Catalog (BC).
This operation must be done for all categories from the price list, the products from which you want to load into the program.
6. Updating the Base Catalog (BC)
After all products are categorized from the base catalog, it is necessary to transfer (create) the information in the base catalog based on the downloaded price list.
When updating the Base Catalog, products will be added that are categorized from the base catalog based on the created download rules.
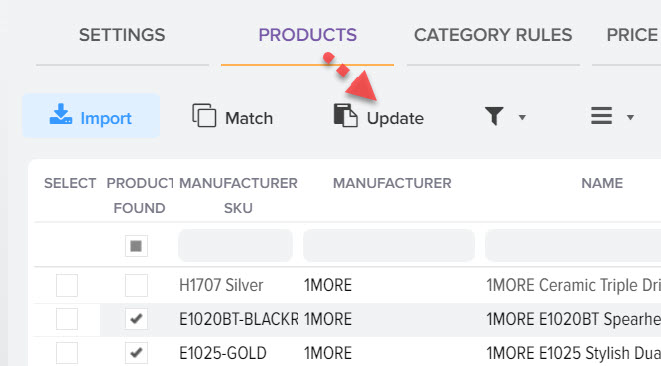
To transfer data to the Base Catalog, go to the "Uploaded Products" tab and click on the "Update Catalog" button.
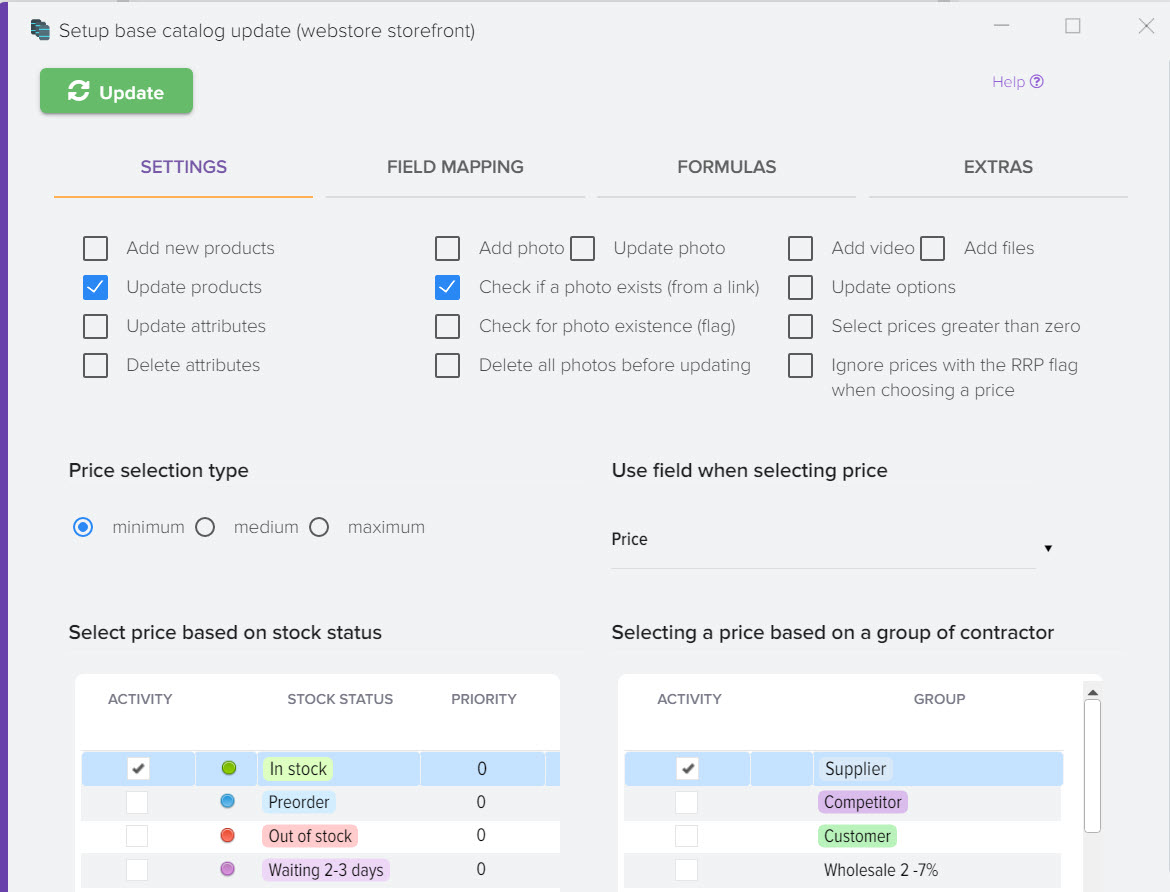
In the window that opens, in the "Update settings" tab, you can uncheck the "Add new products" checkbox if there is no need to add new unmatched products
from the price list, which are not currently in the base catalog. Then click the "Update catalog" button.
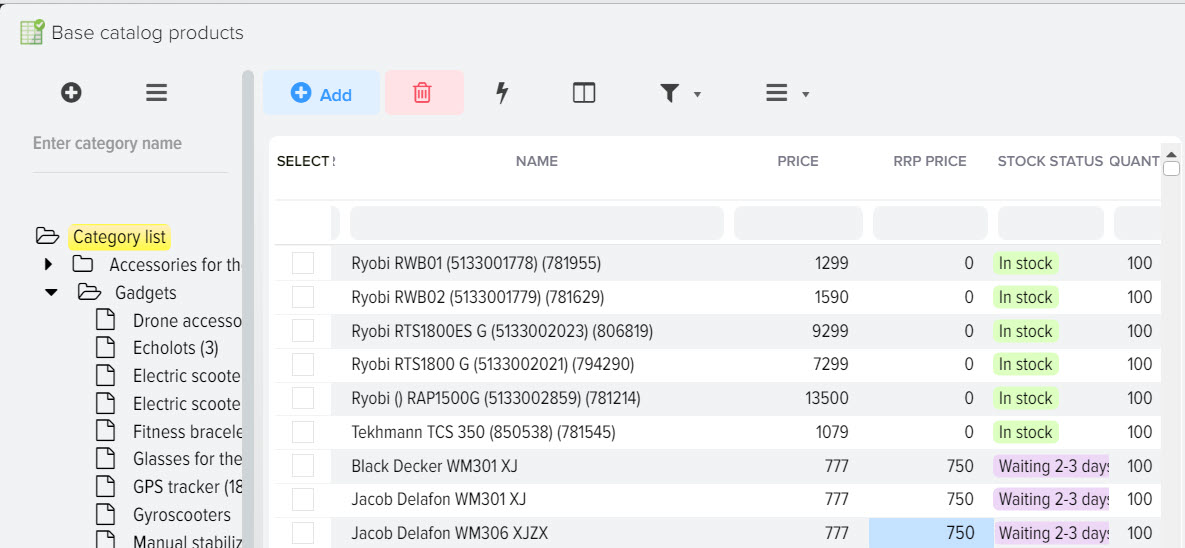
After the process of updating the base catalog is completed, the result of this operation can be observed in the "References" - "Basic catalog of goods" - "Products" section.
In the basic catalog of products you will see products divided into categories.
If, after adding the main products in the category, there is a need to compare products from other price lists, then you need to add the next counterparty by analogy and set up the price list.
After that, start comparing and searching for identical positions between products from the base catalog and downloaded price lists.
Comparison of the same products
After all the products from the price list are divided into categories of the base catalog, you need to start comparing products,
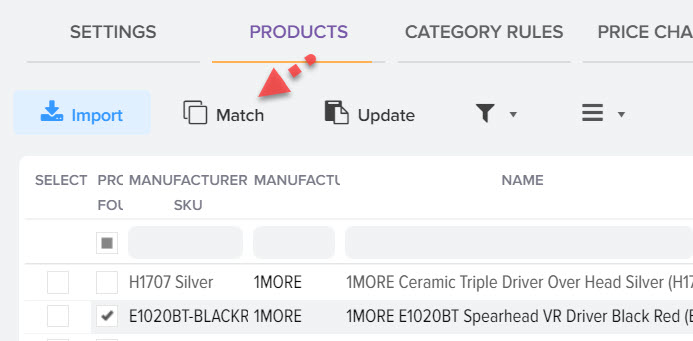
which are not automatically matched. You can match products by clicking the "Match Products" button from the "Downloaded Products" tab.
In this window, at the top there will be a list of downloaded products from the price list, if you become the cursor on one of the product names,
at the bottom of the screen, the program will display a list of the most similar products from the base catalog for possible comparison.
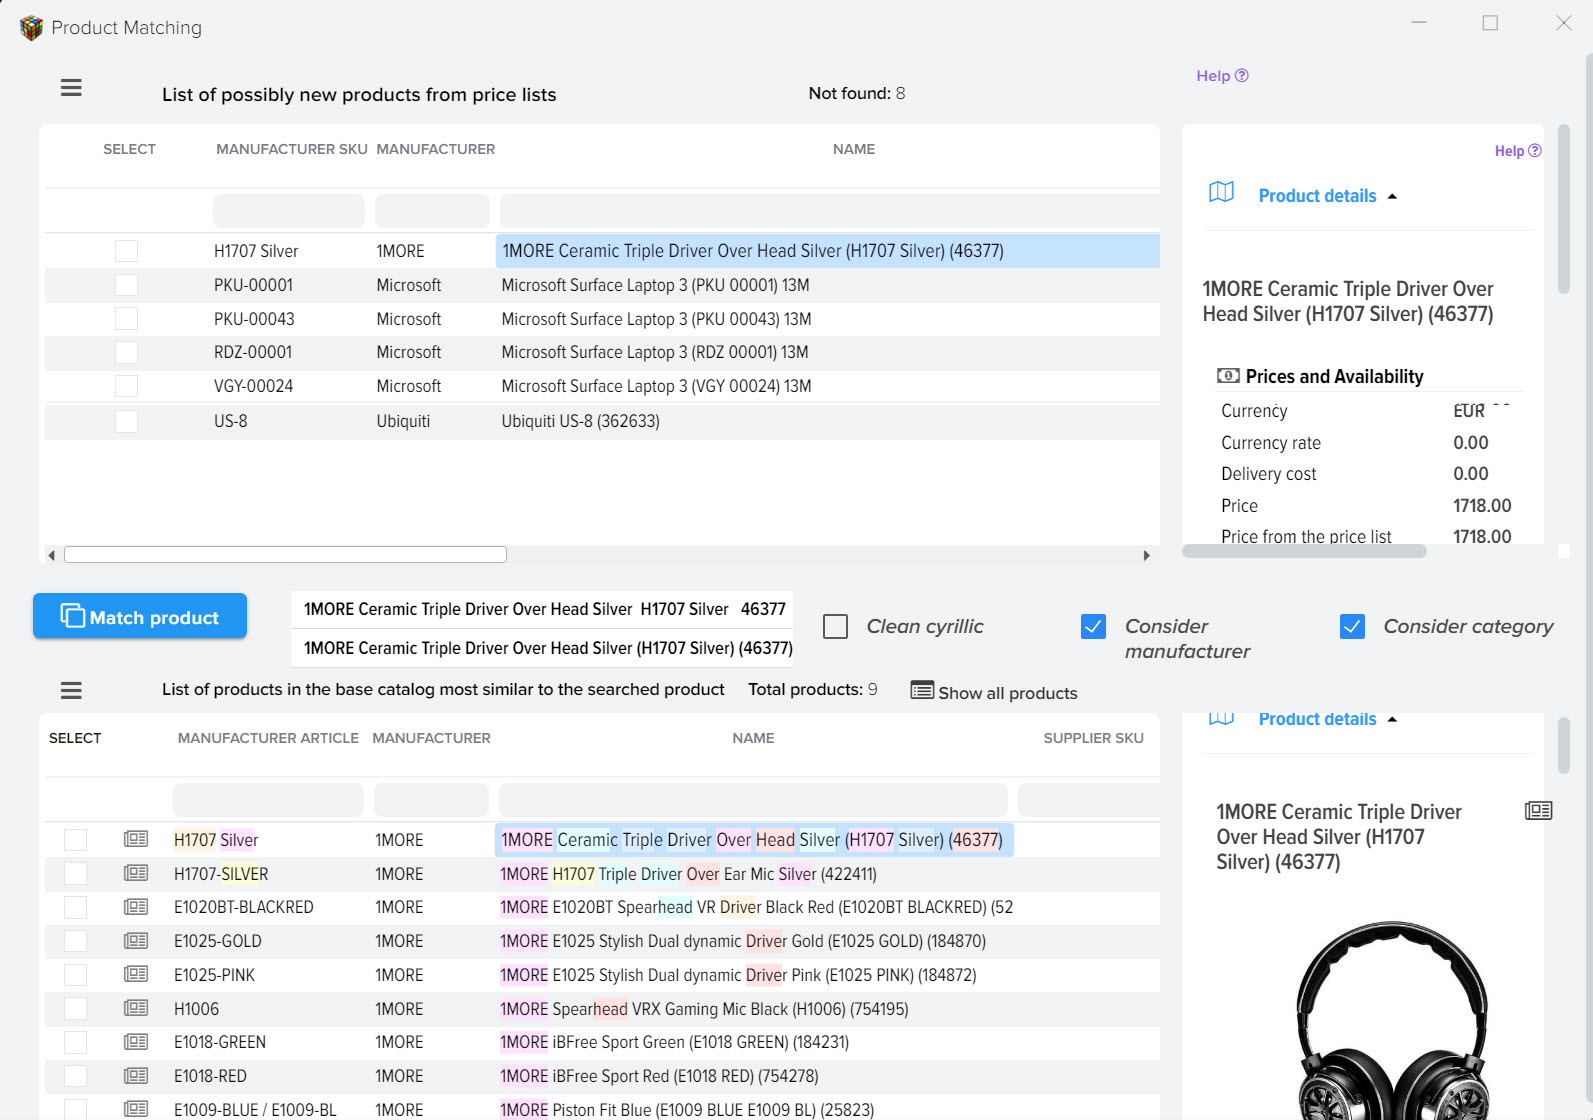
In this example, the product was not matched automatically due to the fact that it has a different name - the word "Player".
Such products can be made to match automatically by fine-tuning the program.
You need to compare products from the price list once, the next time you download the updated price list, all the settings made earlier for it will be saved.
7. Export data.
After you make sure that all the information in the "Basic Catalog" is up to date, you can start uploading data to the site, to 1C, to Excel and to any other available format.
To do this, select "Operations" - "Upload data" in the top menu.
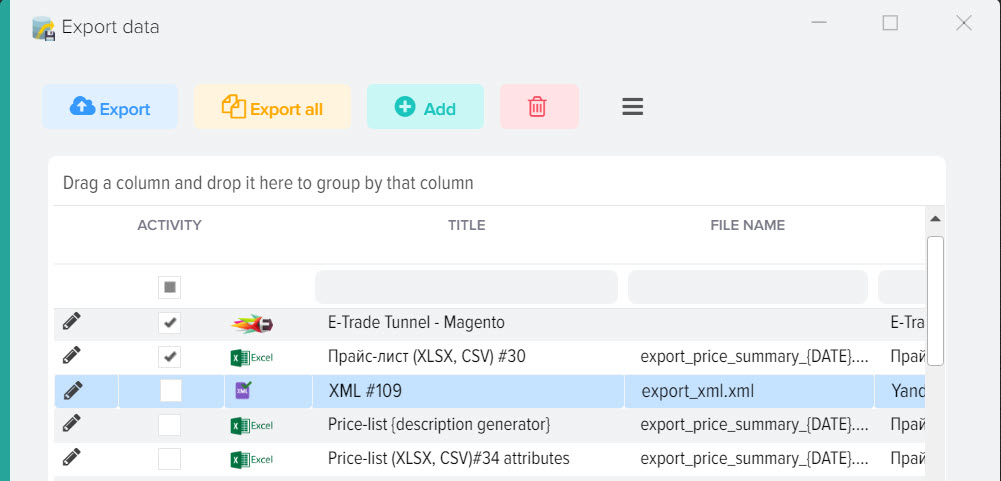
In the window that opens, you can use ready-made templates for uploading or add a new one using the "+" button (add upload template).
Price lists in "XLS/CSV" format can be edited by clicking on the "pencil" icon on the left.
In the window that opens, you can add fields for uploading that you want to see in the final export Excel file.
To place an assortment on trading floors, you must use the YandexMarket (YML) format
For integration with 1C, a file in the CommerceML format is used, which is considered the native 1C format.
Data is uploaded to the site through the Elbuz HTTP Tunnel template.
To place the assortment on Google Shopping, a special format is used in its structure.
- 1. Creation of product categories for the base catalog.
- 2. Adding a counterparty and a price list.
- 3. Definition of product categories.
- 4. Loading data from the price list
- 5. Setting up rules for loading products from the price list.
- 6. Updating the Base Catalog (BC)
- Comparison of the same products
- 7. Export data.


